Growing a lemon tree at home is one of the most rewarding gardening experiences—especially when you can propagate it for free using just a healthy branch and simple materials like tissue paper. Yes, you read that right! The tissue-paper propagation technique is one of the most effective, beginner-friendly, and low-cost ways to root lemon cuttings with near-perfect success.
In this guide, you’ll learn step-by-step how to propagate a lemon tree from cuttings using tissue paper and achieve 100% successful rooting, even if you’re a beginner. This method keeps the cutting moist, maintains proper humidity, and offers faster root development than soil or water propagation.
Let’s begin!
Why Use the Tissue Paper Method for Lemon Cuttings?
Before diving into the steps, let’s understand why this technique works so well:
Consistent Moisture
Tissue paper retains moisture perfectly without becoming waterlogged. This creates an ideal environment for root cells to activate.
Prevents Fungal Growth
Since the cutting isn’t sitting in soil, the risk of rot or fungal infection is much lower.
Fast Rooting
Lemon cuttings root faster when humidity and moisture levels are controlled. The tissue wrap acts like a mini-greenhouse.
Very Low Cost
No rooting trays, no potting mix—just tissue, a plastic bag, and a healthy cutting.
Perfect for Beginners
Even those new to gardening can easily follow this simple technique.

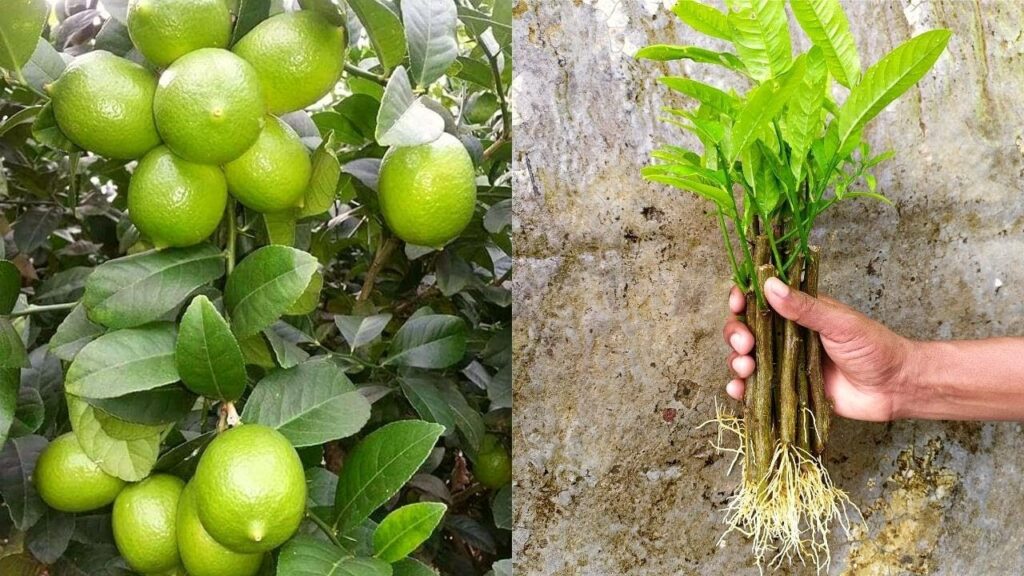
Step 1: Choose the Right Branch for Cutting
Propagation success depends heavily on the type of cutting you select. Always choose:
Semi-hardwood cutting
Not too young and soft
Not too old and woody
A medium-firm branch roots fastest.
Length: 6–8 inches
Long enough to support multiple nodes.
Thickness: Pencil-sized branch
This ensures enough nutrients stored inside.
With at least 3–5 healthy leaves
But we will trim them later.
Avoid:
Branches with disease, pest damage, or flowers. Flowering branches struggle to root.
Step 2: Making the Perfect Cutting

Once you choose your branch:
1. Cut just below a node
Nodes are the points where leaves grow—they contain maximum rooting hormones.
2. Use a sharp, clean knife or pruner
To avoid crushing the stem.

3. Remove all lower leaves
Keep only 1–2 leaves at the top to reduce moisture loss.
4. Optionally dip the cutting in rooting hormone
Although not necessary, it boosts success and speeds up root formation.
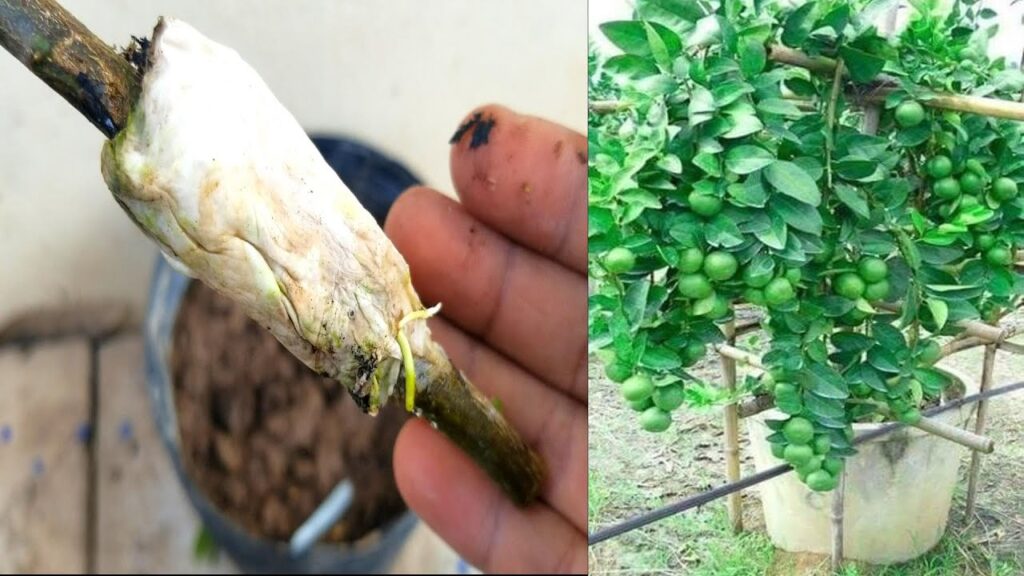
Step 3: Prepare the Tissue Paper Rooting Wrap
This is the core of the method!
Materials Needed
- 2–3 pieces of soft tissue paper
- A spray bottle
- Plastic wrap or a zip-lock bag
- Thread or rubber band
How to prepare it:
1. Wet the tissue lightly
Spray water until the tissue is damp, not dripping.
2. Spread the tissues flat
Make a small rectangular bed for the cutting.
3. Place the cutting on the tissues
Ensure the bottom node is in contact with the moist tissue.
4. Wrap the cutting gently
Cover it like a roll—not too tight, not too loose.
If wrapped correctly, the tissue creates a humid environment that helps rooting hormones activate naturally.
Step 4: Seal It Inside a Plastic Bag
This part turns your cutting into a mini greenhouse.
Place the tissue-wrapped cutting inside a zip-lock bag
Blow a small puff of air to inflate it
Seal it tightly
The trapped air creates a humid chamber that prevents the tissue from drying out.
PRO TIP:
Keep the bag slightly inflated to avoid the tissue touching the bag walls, which prevents mold formation.
Step 5: Provide Proper Temperature and Light
Lemon cuttings root fastest with:
Temperature: 22°C to 28°C (ideal rooting temperature)
Light: Bright, indirect sunlight
Avoid direct sunlight—it can overheat the bag and kill the cutting.
Place it:
- Near a window with filtered light
- On a shelf indoors
- In a shaded balcony
Step 6: Wait for Roots to Develop (12–20 Days)
This is the exciting part!
Do NOT open the bag daily
Disturbing the humidity slows rooting.
Check once every 5–7 days
Only to ensure moisture remains.
New roots appear in 12–20 days
In some cases, slightly longer depending on climate.
Signs your cutting is rooting successfully:
- The tissue looks slightly bulged from new root growth
- Cutting remains green and fresh
- Leaves stay firm and do not wilt
If the cutting turns black or shrivels, discard and repeat with a fresh branch.
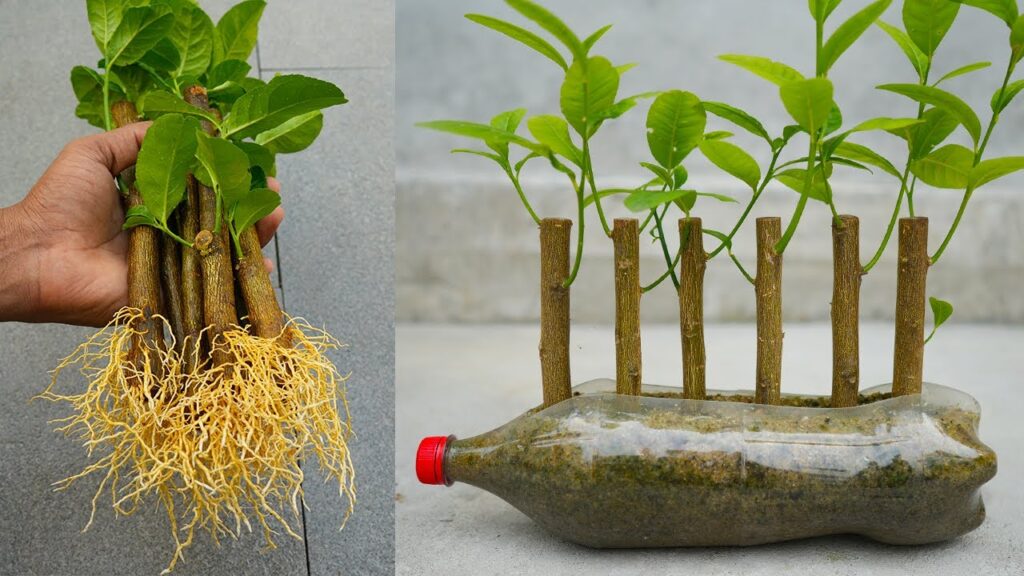
Step 7: Transplant the Newly Rooted Cutting
When the roots grow 1–2 inches long, it’s time to plant the cutting.
1. Prepare a small pot with a light potting mix
Ideal mix:
- 50% cocopeat
- 30% perlite or sand
- 20% garden soil
2. Lift the cutting gently
Remove the tissue carefully—don’t pull roots!
3. Plant it 2–3 inches deep
4. Water lightly
Just enough to settle the soil.
5. Keep it in indirect light for 7 days
Allow the plant to adjust before exposing it to sunlight.
Step 8: Caring for the Young Lemon Plant
To help your lemon plant grow strong:
Water only when the top soil dries
Too much water can cause root rot.
Provide 3–4 hours of morning sunlight
Avoid harsh afternoon sun for a month.
Fertilize after 30 days
Use a mild organic fertilizer like vermicompost or cow dung.
Pinch the top after 8–10 inches growth
This encourages branching and a bushier tree.
Repot after 3–4 months
Select a larger pot and add nutrient-rich soil.
With proper care, your cutting will grow into a healthy lemon tree capable of producing fruits in just 2–3 years.
Why This Method Guarantees Near 100% Success
The tissue paper + plastic bag method works because it creates:
Ideal humidity
Consistent moisture
Proper air circulation
Protection from fungus and rot
A stable environment for root cells to activate
Unlike soil or water propagation, this method removes almost all common causes of cutting failure.
Final Thoughts
Propagating a lemon tree from cuttings using tissue paper is one of the easiest and most reliable gardening hacks. Whether you’re a beginner or an experienced gardener, this method ensures fast rooting, zero complications, and nearly 100% success.
All you need is:
A healthy branch → Tissue paper → Plastic bag → Warm light
And in just a few weeks, you’ll have a brand-new lemon plant growing strong.