Guava is one of the most rewarding fruit trees you can grow at home—fast-growing, low-maintenance, and incredibly productive. But what if you could skip the long wait of seed-grown plants and create a new guava tree that fruits much sooner? That’s exactly what air layering helps you achieve.
Air layering is one of the simplest and most successful propagation methods for beginners. It allows you to grow a new guava plant directly from a branch of a mature tree—without removing it from the mother plant until roots are fully formed. This ensures almost 100% success and strong, early fruit-bearing plants.
In this complete beginner-friendly guide, we’ll walk through everything you need to know about air layering: from choosing the right branch to caring for your new guava tree after detaching it. Let’s get started!
What Is Air Layering and Why Use It for Guava Trees?
Air layering is a propagation method that encourages roots to grow on a selected branch while it’s still attached to the parent tree. Once strong roots form, the branch can be cut and planted as a new tree.
Why air layering works perfectly for guava:
- High success rate – Guava responds extremely well to air layering.
- Faster fruiting – Your new plant is a clone of the parent plant, so it matures faster than a seedling.
- Better quality plants – You preserve the traits of the mother plant, such as sweetness, fruit size, or disease resistance.
- Perfect for beginners – Requires minimal tools and is almost foolproof.
When Is the Best Time to Air Layer Guava Trees?
Timing is crucial. The ideal months vary slightly by region, but generally:
Best Time:
- Late spring to mid-monsoon
- When the tree is actively growing and temperatures are warm.
Avoid:
- Peak summer heat
- Cold winter months
This ensures fast root growth and minimal stress on the plant.
Tools and Materials You Will Need
You don’t need any fancy equipment—simple household and garden items are enough.
Materials:
- Sharp knife or pruning tool
- Moist cocopeat, sphagnum moss, or garden soil mix
- Plastic wrap or polythene
- Twine or zip ties
- Rooting hormone (optional but increases success)
- Aluminum foil or black plastic to cover the layer
- Clean water
Step-by-Step Guide: The Best Air Layering Technique for Guava (Beginner Friendly)
Follow these simple steps to guarantee success:
Step 1: Select the Right Branch
Choose a branch that is:
- Healthy and disease-free
- About 1 to 2 cm thick
- Mature but flexible
- Exposed to good sunlight
Avoid very young or extremely woody branches since they root slowly.
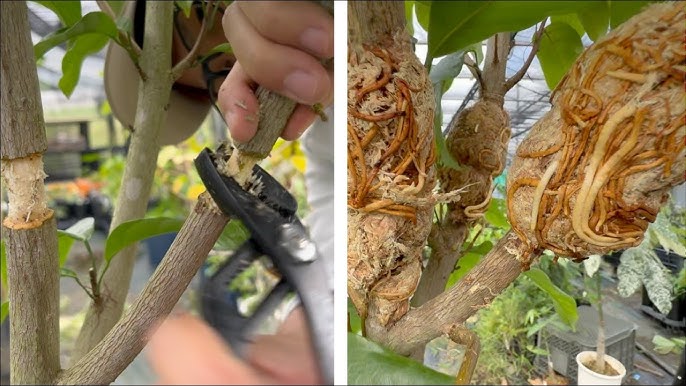
Step 2: Make the Cut (Ring Barking Method)
This is the most reliable method for guava.
- Measure 2–3 cm length on the branch.
- Make a circular cut around the branch.
- Make another circular cut parallel to the first one.
- Remove the bark entirely between these cuts.
- Scrape the exposed area lightly to remove the green cambium layer.
This prevents the branch from healing and redirects its energy to forming roots.

Pro Tip:
Do not cut too deeply—avoid damaging the hard wood.
Step 3: Apply Rooting Hormone (Optional but Recommended)
Dust or brush a small amount of rooting hormone on the cut area.
This speeds up root formation and increases success, especially during suboptimal weather conditions.
Step 4: Wrap the Cut Area with Moist Growing Medium
Your goal is to keep the cut area moist but not waterlogged.
Common materials:
- Cocopeat
- Sphagnum moss
- A 50/50 mix of garden soil and compost
Steps:
- Moisten your medium (not dripping wet).
- Take a handful and gently wrap it around the exposed cut.
- Cover the entire area thoroughly—rooting happens only in moist conditions.
Step 5: Seal with Plastic Wrap
Secure the growing medium tightly.
- Wrap it with clear plastic or polythene.
- Seal both ends using thread or zip ties.
- Ensure no air gaps and no water leaks.
Why use clear plastic?
You can easily check for root growth without opening the layer.
Step 6: Cover with Foil or Black Plastic
Guava roots love darkness.
- Wrap the area with aluminum foil or black plastic to block sunlight.
- This helps retain moisture and encourages root formation.
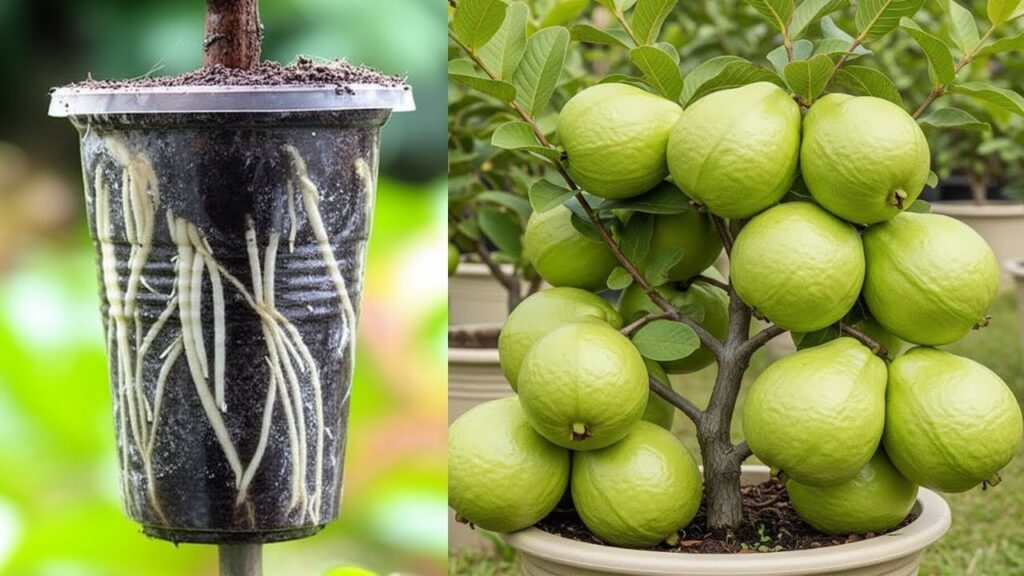
Step 7: Wait for 4–8 Weeks (Monitor Root Growth)
Air layering requires patience, but not too much.
In ideal warm weather:
- Small roots appear within 4 weeks
- Fully developed root ball forms in 6–8 weeks
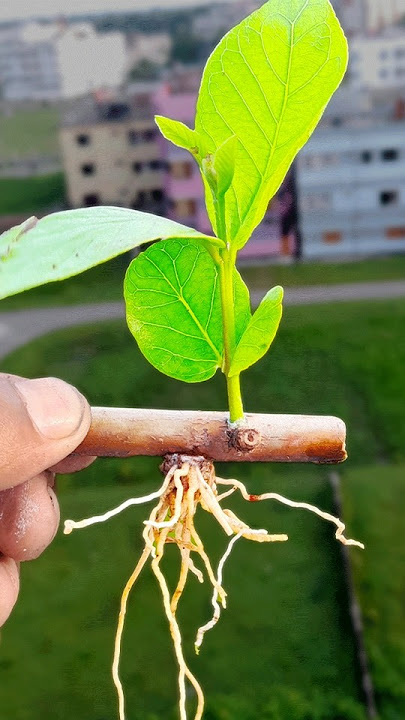
Peel back the foil gently and inspect through the plastic. The layer is ready when:
- Roots are visible all around
- The root mass looks full and firm
- The branch feels heavier
Step 8: Cutting and Potting Your New Guava Plant
Once the root ball is ready:
- Use sterilized pruning shears.
- Cut just below the rooted area.
- Remove the wrap carefully without disturbing the roots.
- Plant the new tree in a well-draining potting mix.
Best Potting Mix for Young Guava:
- 40% garden soil
- 30% cocopeat
- 20% compost
- 10% sand
Water gently after planting.
Step 9: Aftercare for Your New Guava Tree
To ensure strong establishment:
First 2–3 Weeks:
- Keep the plant in partial shade.
- Maintain consistent moisture—neither dry nor soggy.
- Avoid fertilizing immediately.
After 3 Weeks:
- Move to full sun gradually.
- Once new growth appears, apply a mild fertilizer like:
- Vermicompost
- Cow dung compost
- Balanced NPK 5-10-5
First Year Tips:
- Protect from strong winds.
- Water regularly, especially during dry spells.
- Pinch new tips to promote branching.
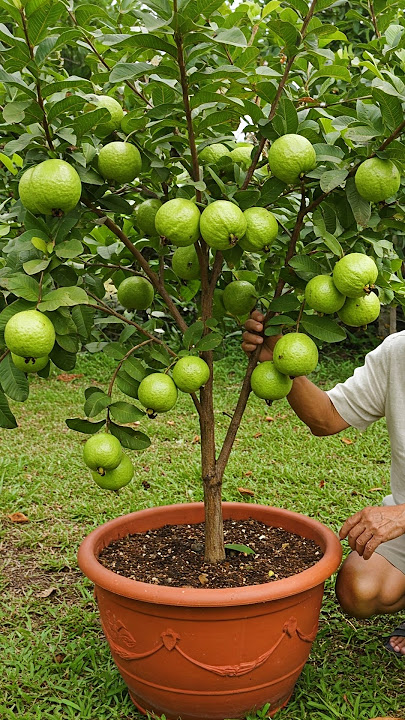
When Will Your Air-Layered Guava Tree Start Fruiting?
One of the biggest advantages of air layering is early fruiting.
Expected Fruiting Time:
- 12 to 24 months, depending on variety and care.
Seed-grown guava trees often take 4–6 years—air layering cuts that waiting time by half or more.
Troubleshooting Common Air Layering Issues
Issue 1: No roots even after 8 weeks
Cause: Dry medium, cold weather
Fix:
- Re-moisten the medium
- Cover with foil
- Try during warmer months
Issue 2: Medium turns black or smelly
Cause: Too much water
Fix:
- Replace the medium
- Reduce watering
Issue 3: Leaves wilt after separation
Cause: Sudden exposure to strong sun
Fix:
- Keep in shade
- Mist daily
Final Thoughts: The Easiest Way to Grow a Healthy Guava Tree at Home
Air layering is hands-down the best beginner technique for propagating guava trees. It is simple, low-cost, and delivers fast, reliable results. Whether you’re expanding your home garden or helping friends start their own guava trees, this method guarantees a strong, fruit-bearing plant with the exact characteristics of the parent tree.