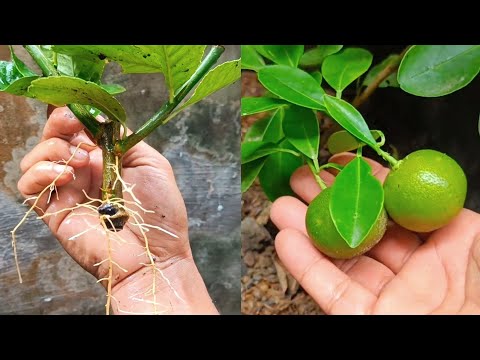
Lemon trees are among the most rewarding plants to grow at home. Their fresh aroma, glossy green leaves, and juicy fruits make them a favorite for gardeners. But did you know you can grow your own lemon tree completely free using just a simple cutting? Yes! With the right method, you can turn a small stem into a healthy, fruit-bearing lemon tree.
In this detailed guide, we’ll walk you through the easiest and most reliable way to propagate lemon tree cuttings, even if you’re a beginner. Follow this step-by-step tutorial, and you’ll enjoy seeing your cuttings root and grow faster than you ever expected!
Why Propagate Lemon Trees from Cuttings?
Before we dive into the method, it’s good to understand why lemon cuttings are such a great option:
You Get a True Copy of the Parent Tree
Unlike growing from seeds, cuttings grow into identical clones of the parent plant. This means you’ll get:
- Same fruit quality
- Same size
- Same growth pattern
If the mother plant is healthy and productive, your new tree will be too.
Faster Growth Than Seeds
Cuttings grow and mature much faster than seed-grown plants, reaching flowering and fruiting stages sooner.
Low-Cost & Beginner-Friendly
You only need a branch, basic tools, and a rooting medium. No special equipment required!
Best Time to Propagate Lemon Tree Cuttings
The ideal time is during early spring or early monsoon, when plants are actively growing. However, you can also propagate:

- In late summer
- In mild winters (indoors)
Avoid extremely hot months, as cuttings dry out quickly.
What You’ll Need
Here’s your simple checklist:
- Healthy lemon tree (mother plant)
- Sharp pruning shears
- A 6–8 inch semi-hardwood cutting
- Fresh potting mix (well-draining)
- A small pot with drainage holes
- Rooting hormone (optional but helpful)
- A plastic bag or bottle for humidity
- Clean water
Step-by-Step: Easiest Method to Propagate Lemon Tree Cuttings
Step 1: Select the Perfect Cutting
Choose a lemon branch that is:
- Semi-hardwood (not too soft, not too woody)
- Disease-free
- About 6–8 inches long
- With at least 3–4 leaf nodes
Avoid branches that are too young or flowering shoots.
Step 2: Make a Clean, Sharp Cut
Using sterilized shears, cut the branch at a 45-degree angle.
This increases the rooting surface and reduces water loss.
Then:
- Remove all leaves except the top 2 small ones
- Cut large leaves in half to reduce moisture loss
Removing extra foliage helps the cutting focus on root formation.
Step 3: Prepare the Rooting Medium
The rooting soil must be:

- Loose
- Well-draining
- Moist, not soggy
Best mixes:
50% coco-peat + 50% sand
60% garden soil + 40% compost
Perlite + peat
Avoid heavy clay soil.
Step 4: Apply Rooting Hormone (Optional)
Dipping the bottom 1 inch of the cutting in rooting hormone:
- Speeds up root growth
- Reduces stem rot risk
- Increases success rate
You can use:
- Store-bought rooting hormone
- Or homemade options like cinnamon, honey, or aloe gel
Let the powder stick properly before planting.
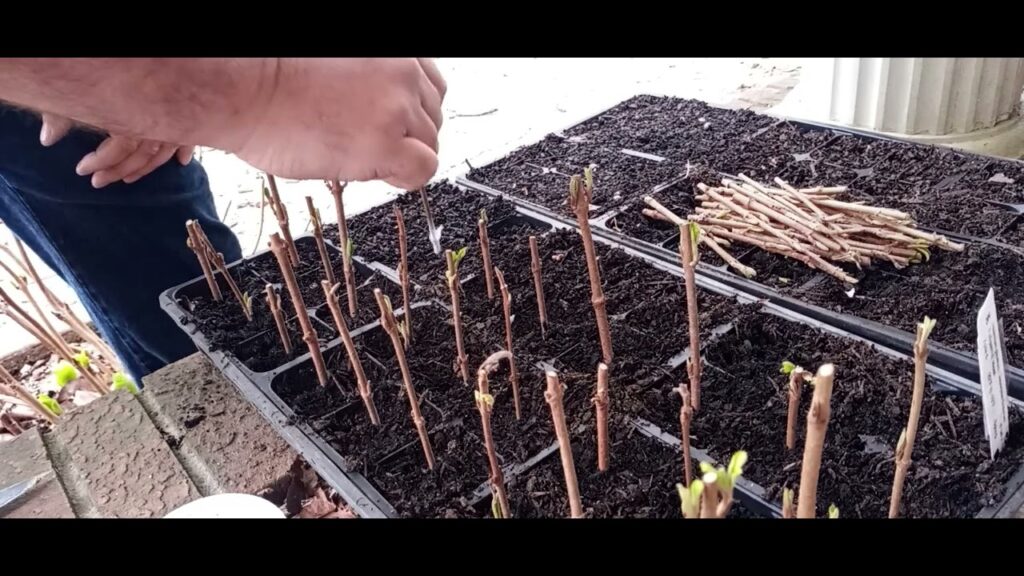
Step 5: Plant the Cutting
Make a small hole in the soil and insert the cutting about 2–3 inches deep.
Press the soil firmly around the stem to remove air pockets.

Ensure:
- Cutting is upright
- Soil is evenly moist
Step 6: Create a Mini Greenhouse (Very Important!)
Lemon cuttings need high humidity to root successfully.
Cover the pot with:
- A transparent plastic bag
- A cut plastic bottle
- A humidity dome
This traps moisture and prevents drying out.
Make 1–2 tiny holes for air circulation.
Place the pot in bright but indirect light—never direct sun.
Step 7: Watering and Care During Rooting
Water lightly every 3–4 days or whenever the soil feels slightly dry.
Important:

- Do NOT overwater (it may rot the stem)
- Keep the bag on for at least 3–4 weeks
- Avoid moving the pot too much
How Long Does It Take to Root?
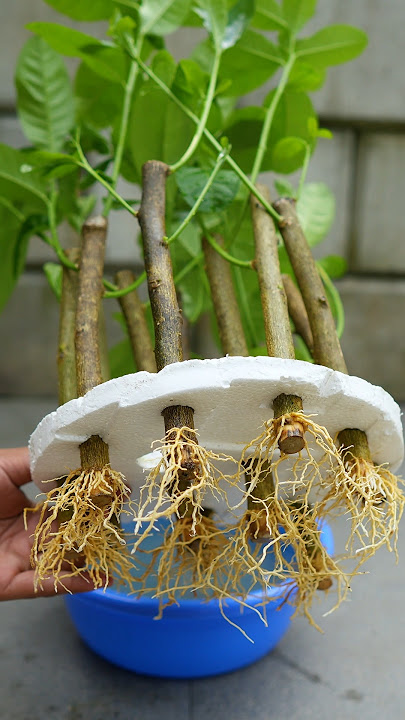
Usually:
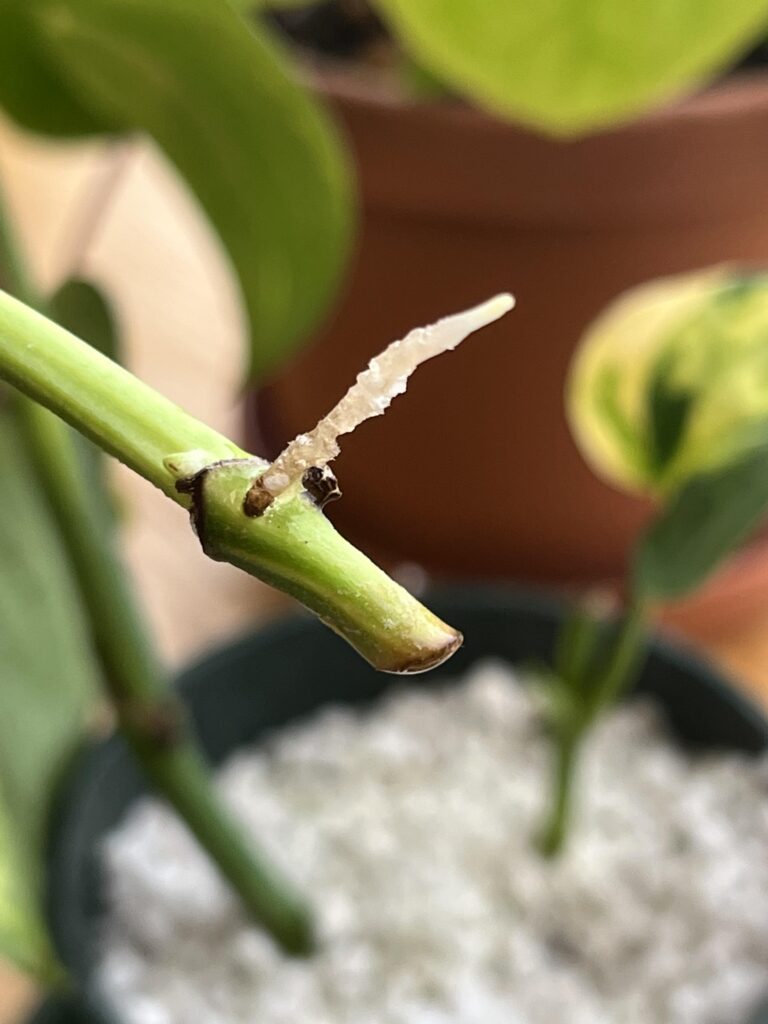
- Small root formation: 2–3 weeks
- Strong rooting: 4–6 weeks
- Ready for transplant: 8–10 weeks
You’ll notice new leaf growth — this is a strong sign that roots have formed.
Aftercare: Helping Your New Lemon Plant Grow Fast

Once your cutting has rooted, follow these tips:
1. Gradually Expose to Sunlight
Remove the plastic cover slowly:
- Day 1–3: Take it off for 1 hour
- Day 4–7: Increase to 3–4 hours
- After 1 week: Remove completely
2. Transplanting
Move it into a bigger pot filled with:
- Garden soil
- Compost
- Sand
- Coco-peat
3. Fertilize Regularly
Feed once every 20 days:
- Vermicompost
- Cow dung compost
- Banana peel fertilizer
- Seaweed fertilizer
Avoid chemical fertilizers in early stages.
4. Keep Soil Moist
Never let it fully dry out. Lemon plants prefer lightly moist soil.

Common Mistakes to Avoid
Using soft, weak branches
Overwatering the pot
Keeping the cutting in harsh sunlight
Not providing humidity
Using poor-quality soil
Cutting with dirty shears
Avoid these mistakes to ensure a high success rate.
When Will Your New Lemon Tree Give Fruit?
Lemon trees grown from cuttings generally start producing fruits in:
2–3 years
This is much faster than seed-grown plants, which take 4–7 years.
Final Thoughts
Propagating lemon trees from cuttings is one of the easiest, cheapest, and most dependable ways to grow your own lemon plant at home. With the simple method in this guide, you can enjoy 100% rooting success and grow healthy, vigorous lemon plants in your garden or balcony.
All you need is the right cutting, proper care, and a little patience—and soon, you’ll have your own thriving lemon tree!